I have had a few dye jobs sent my way lately. Dyeing things for other people, especially dyeing expensive baby carriers for other people gives me such an adrenaline rush, after all colour is so difficult to describe, and to photograph, and usually the people that I dye for live a way away, so most communication is by email. Don't get me wrong though, I love it! I love the textiles, the patterns, the textures and most of all the colours. I love the process as well, splashing around with colour is one of my favourite things to do.

Mulberry Leo
This carrier started out as a Natural Leo Storchenweige wrap carrier.

His owner lives in Adelaide but was coming for a family holiday in Canberra, so she brought Leo with her so I could dye it while she was here. And lucky it worked out that way...

The leo was supposed to be a nice purply colour, but not to vivid, so we decided on a colour like dusky violet from Kraftkolour. I ordered the dye, and when the Leo came to Canberra (and it was so great to meet another babywearer that goes on holiday with the car boot half full of carriers!), he went for a swim.


but turned out an icky gun metal grey colour :(


His owner wasn't thrilled with his colour, and neither was I, so back he went into a magenta dyebath, and turned out a much better colour. He is now called Mulberry Leo.


I am not thrilled with Kraftkolour's mix of dusky violet. I think that I will stick to my old reliable dye supplier at dyeman.com, and stick to pure colours and play with mixing them myself.

Scarlet Vicky
Vicky was a yellow Storchenweige wrap that was living in Darwin and wrapping some gorgeous twins, and the twins were born on the same day as my Monkey 4. Vicky is yellow with yellow stripes, and the owner of the wrap really didn't do yellow so well, so she wanted Vicky to go red.

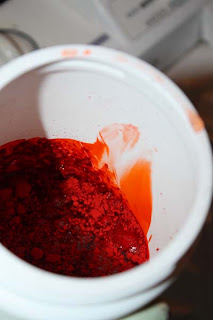
I put her in a strong bath of stock red dye from dyeman.com (see, nice and reliable!),

and she came out looking like Lego brick red, with subtle stripes. Her owner was really happy with her transformation and now calls her Scarlet.


Mulberry Osnaberg
When people see woven wraps, they seem to say "but can't you just make one out of fabric?", but up till now finding a fabric that behaves properly (ie not much horizontal or vertical stretch, but some diagonal stretch) has been a challenge. Recently the good women at TheBabyWearer.com have been going crazy for a fabric called Osnaberg. It is a roughish sort of fabric that is used for quilting and other things, but has the diagonal give that is so comfy when wrapping a baby to an adult.

Being the fabric addict I am, I decided to jump on this bandwagon and see what all the fuss is about. I sourced 3.5 metres at a local fabric store (at four times the price it is retailing in the US, what is with that???), hemmed it, gave it tapers, and gave it a burl.
Pretty comfy for a rucksack back carry tied under the bum, and doable for a reinforced rucksack carry tied at the front in the tails.

I need more practice with gradation dyeing, and wanted to know how the Osnaberg would dye, and had a whole heap of Kraftkolour dusky violet dye to use up, so I did a gradation dye with a blend of dusky violet and red. It turned out pretty nice.


and it kind of matches my bag :)

what's on the go?

So many things happening at the moment!

The Love Of My Life has a new job, which is mostly wonderful but partly stressful.

Wonderful because his old job wasn't making him happy, it was making him pretty miserable. His old boss was a stinker who had no idea about managing or keeping staff. Wonderful because now instead of a 90 minute bus ride or 30 minute drive to work each day he now works in our spare room. Wonderful because our house is full of eye candy all day long.

Stressful because his old boss is threatening legal action against us. Stressful because some of his work needs to be done in Sydney and we don't live in Sydney, so he has been away three times in three weeks, once for the whole week. Stressful because I am used to my own space in the house during the day, and I am not in the habit of explaining where I am during the day.

But ultimately wonderful. TLOML is happy, and so we are all happy!


Making making making.

Spinning wool for the local show and to practice dyeing and navajo plying, and hurrying up as best I can with that so that I can get onto the kgs of fibre my sister bought for me when she went to Bendigo Wool Mills. What a fantastic sister :) Here is the fibre I dyed, it is merino roving (or is it sliver, I don't know the diffy), I am spinning it fine to look a bit like watermelon. Watch this space.

Sewing some more slings, for others and for me.

Sewing some clothing for me. I made a skirt, and have the fabric for another skirt, just waiting for me to sew up. I have to get better at altering patterns, then I can make some tops that fit. I want to sew some bags for my friends.

I am also crocheting a little bag for one of my friends. It is so good to sit and hook when Monkey 4 lets me.

I have been married to the Love of My Life for 10 years and three days and we are still madly in lurve. Thanks so much to my sister and her wonderful partner, they looked after Monkeys 1, 2 and 3 while the LOML and I and Monkey 4 went out for a wonderful celebratory dinner.

more details about more stuff going on to follow :)

not allowed to parent

We had a bit of a drama getting Monkey 4's birth certificate organised (paperwork is not the forte of our homebirth midwife...), but one of the complications involved my occupation.

For the last 8 years I have pretty much full time parented our kids (with the love of my life). I haven't had much paid employment since we started breeding. So when the ACT office of Births Deaths and Marriages asked about mother's occupation for Monkey 4's birth cert, I put Parent.

Turns out that Parent is not a valid occupation. I could be Homemaker, or Housewife, but not Parent.

WHAT IS WITH THAT??? Admittedly Parenting does not have very good (or any) superannuation, or health insurance, or workplace benefits. I do not get an hour paid lunchbreak on the days I work. I don't have to wear special clothes, apart from ones that don't show the puke or the snot stains. And I don't do housework (any more than is necessary). So I can't be a Homemaker. Geez.

So in the end I relied on the qualification that I will likely never earn enough to have to pay for, and put Teacher. I could have done a Smarty Pants effort and put in all of the occupations that are listed in that email that goes around every now and again that say how a mother is really about a thousand things at once, but really, I wanted to be a Parent.

I love being a Parent. It is the hardest and the bestest thing I have ever done in my life. It is intense, and all incompassing, and boring and exhilerating and difficult and heart wrenching and wonderful, all at once. It is a fecking hard job, and possibly the most important job on the planet. And I am proud to do it.

Just pissed off that the goverment won't let me be Only a Parent.

Weird Arse Time Dilation


Something strange is going on. Maybe it has to do with the Large Hadron Collider being turned on, but probably not.

Something strange is happening to time. At least at my house. It used to take me approximately 24 hours to get the sleep that I can survive on, care for myself, care for three monkeys, maintain a happy marriage and social life, and even get a few extra things done. You will notice that housework didn't fit into the above list. With the addition of Monkey 4 into our lives, I have found that the 24 hours have stretched somewhat. Now I seem to be able to get the sleep I can survive on (survive, not crave, but there you go), care for myself (and who really needs a daily shower, it is winter!), care for FOUR monkeys, maintain a happy marriage and social life. Still no housework. No point changing everyone's life dramatically at this point in time.

This weird time stretch has been gradual, and hasn't finished yet. I can actually feel the stretch happen. A few weeks ago the time it took to care for Monkey 4 butted into the time available in 24 hours, and other things had to go by the by. But gradually the 24 hours are stretching to fit more in. Daily, I seem to be able to cram more in.

weird, huh?

spun


Finally, some fibre all spun up and ready to use :)

I bought this fibre at the Old Bus Depot Markets on Wool Day a few months ago. Isn't it GORGEOUS?!?!?


So I spun it up with lots of air, so that it can be a nice soft beannie for the new Monkey. I then plied (my first ever ply!) it with some rayon machine embroidery thread in a beautiful purple, making it look like this

Nice! I have spun up a second bobbin of this opaly merino roving, and plied most of it. It is on the niddy noddy as I type, and the rest of the bobbin will be plied hopefully tonight. Then on the niddy noddy, in for a wash, a dry and then to crochet a little Monkey hat. Awwww!

interesting biology


I thought that I understood a fair bit about the monkeys. Seems I still have a lot to learn... Monkey 2 drew a picture of her innards about a year ago, it had a stomach for dinner and a much bigger stomach for dessert. Ok, makes sense.

But today we had this conversation
me - pooh what a stink, who farted?
everyone else - no, not me
me - well someone did, this house reeks
Monkey 2 - is it Saturday or Sunday?
me - it is Saturday
Monkey 2 - well, I never fart on Saturday, so it couldn't have been me.

who knew?

dye dye dye


I am going to post my dyeing technique since I have typed it out a few times and can never find it when I need it to send to someone who asks. So here goes

How Kate Dyes Stuff

What I use
  • fibre reactive dye (procion or drimarene K)
  • pool salt (non iodised)
  • soda ash (for making pool water alkaline)
  • synthrapol (a heavy duty detergent)
  • kitchen digital scales
  • more accurate digital scales (I got mine off ebay, I think that they were marketed for measuring small amounts of drugs, but they weigh dye nicely)
  • plastic spoons
  • dust mask
  • rubber gloves
  • some old plastic jars that never ever get used for anything else
  • some old pantyhose (knee highs are great for this)
  • a bucket
  • my wonderful bought-especially-for-the-purpose twin tub washing machine
  • far too much water in this drought afflicted nation
How I Dye Stuff
  1. Weigh the dry stuff* to be dyed, and write the weight in grams.
  2. If the stuff hasn't already been washed, then put it into the wash to get the sizing out of the fabric, and any marks or stains.
  3. Sit down and do some maths. Work out what colour the stuff is to turn out like, and how dark I want it. For a pastel sorta colour, I would use about 1 or 2% of the weight of the stuff in dye. So, if there was 1kg of stuff, then I would use 10 or 20 grams of dye. For a mid colour, I would use about 6% to 8% of dry weight of stuff, and for a darker colour I would use lots more. So work out how heavy the stuff was dry, and work out what percentage of dye you want to use, and then actually how much dye that is. If you ever think you might like to repeat this colour or do any more dyeing, you might like to write your maths down and keep it somewhere safe that you can find it again.
  4. Now for the Doing :) I retire to the bathroom where the twin tub washer is. Don gloves and dust mask. Collect all above gear.
  5. I add about 20 litres of warm water to the washer. Add about 1 kg of salt. Agitate it for a few minutes to dissolve the salt. Then put the stuff in the water and agitate it a bit more to get the stuff all nice and wet.
  6. While the salt is dissolving and the stuff getting wet, I measure the dye into a dry clean plastic container that will be used for nothing else. When the dye is all measured accurately, I put some warm to hot water in and stir it up with a plastic spoon. It is a real bugger and messes up a dye job to have blobs of undissolved dye. Then stretch a knee high pantyhose over the top of the jar, and tip it into the washer. The stocking catches any lumps, and then tip some more warm/hot water back into the jar through the stocking, then swish it around a bit, then tip it into the washer. Repeat till you aren't getting any dye goobers stuck in the stocking.
  7. Set the washer to agitate for about 15-20 minutes. If you are using a top loading washing machine you have to be careful that your dye doesn't go down the drain. If you are using a twin tub you don't have to worry about that at all. It just sits there and does as it is told until you tell it something else. Sweet!
  8. If your stuff is long and tangly, stop the agitation every now and again, and wearing gloves, untangle the stuff, then agitate again.
  9. If you aren't using a machine at all, but hand dyeing in a plastic tub or the bath or the laundry tub, then make sure that the dye gets into all the seams and bits of the stuff. This is the "get the dye into the fabric" part of the process.
  10. Once the dye is well into all the bits of the fabric, it is time to set the dye so it stays put for ever. I measure about 350g of soda ash and tip it into a bucket of hot water. This is enough soda ash to do the job with the amount of water I use. The amount of dye you need is a function of the weight of the dry stuff, the amount of soda ash you need is a function of how much water you are using.
  11. VERY IMPORTANT. Add dry soda ash to a bucket of water. Don't you dare do it the other way around. Adding water to dry soda ash makes it explode. You seriously don't want this stuff exploding in your house, and especially you don't want it expoding in your face. JUST DON'T DO IT OK???
  12. Stick your gloved hand into the bucket and swish the soda ash around until it is all dissolved. If you skip this part then you will likely get blobby results in your dyeing. If that is what you are after, go for your life. But for nice smooth dyeing, make sure you dissolve it all.
  13. Move the stuff to one side of the washer. Slowly and carefully tip the soda ash solution into the other side of the washer. Some people take 15 minutes to do this, I take about 15 seconds and it works for me.
  14. Set the washer to agitate for about 10 minutes. This is the "keeping the stuff moving around and keeping it evenly wet so that the fixative can do its thing for a very even dye job" part of the process. If the stuff is unevenly wet, the dye job will be uneven. Been there, done that, ruined the t shirt.
  15. Since mostly I like to dye nice rich colours, I like to leave my stuff in the soda ash bath for about an hour or longer. I agitate it for about 10 minutes, and rest it for about 5 minutes, repeat till the hour is up. Once again, if the stuff is tangly, I untangle it regularly. Of course I wear gloves, I don't want alkali solution all over my lily white hands, and I don't want to look like I have been finger painting for the next three days.
  16. If you are doing this bit by hand, keep it moving the whole time. Very labour intensive. I used to do it this way and got some good results from hard work, and some bad results from taking too many breaks and using a trough that was too shallow.
  17. Once the soda ash has done its thing, I let all the solution out of the machine.
  18. Squeeze as much dye out of the stuff as you can, then put it in the spin tub of the machine. Spin that bugger out till there are no more drips coming out of the hose.
  19. Put the stuff back into the washing tub, and put a couple of buckets of warm water into the tub. Agitate it to rinse it for a few minutes, then let the water out. Spin it out. Repeat until the water is clear. Takes ages. Very boring. Very necessary.
  20. When the stuff is well rinsed, I put it in a bucket with hot water and a splash of synthrapol. This takes most of the loose dye out of the stuff. Leave it there for at least 20 minutes, overnight if you can, 2 days if you forget it is there and you get busy with life.
  21. Repeat steps 18 and 19.
  22. Put the stuff through a warm wash with an extra rinse in the washing washing machine (not the dyeing washing machine) with normal washing powder (we use Aware). For really dark colours repeat this step a few times.
  23. Done! Dry your stuff and enjoy it.


* stuff = fabric, clothing, carriers, slings, fibre etc and so on. These instructions are for stuff made from cellulose fibres such as cotton, linen, hemp etc.